So here I sit on a Sunday evening. I’ve got this race car, and I’m presently 3d printing something to help me fix it. I spent ALL DAY scouring the internet for information relating to various possible permutations of the project, some of which might include printing a fairly large part that gets used in the final build.
I’ve started this site to try to aggregate my findings and put them where others might find them useful. Also I may add forums/wiki and other collaboration stuff if others seem interested. I could even go so far as to find a less ugly template for the site! (actually, that will be first).
But How did I get here?… This is an additive manufacturing oriented site so let’s start with the 3d printing…
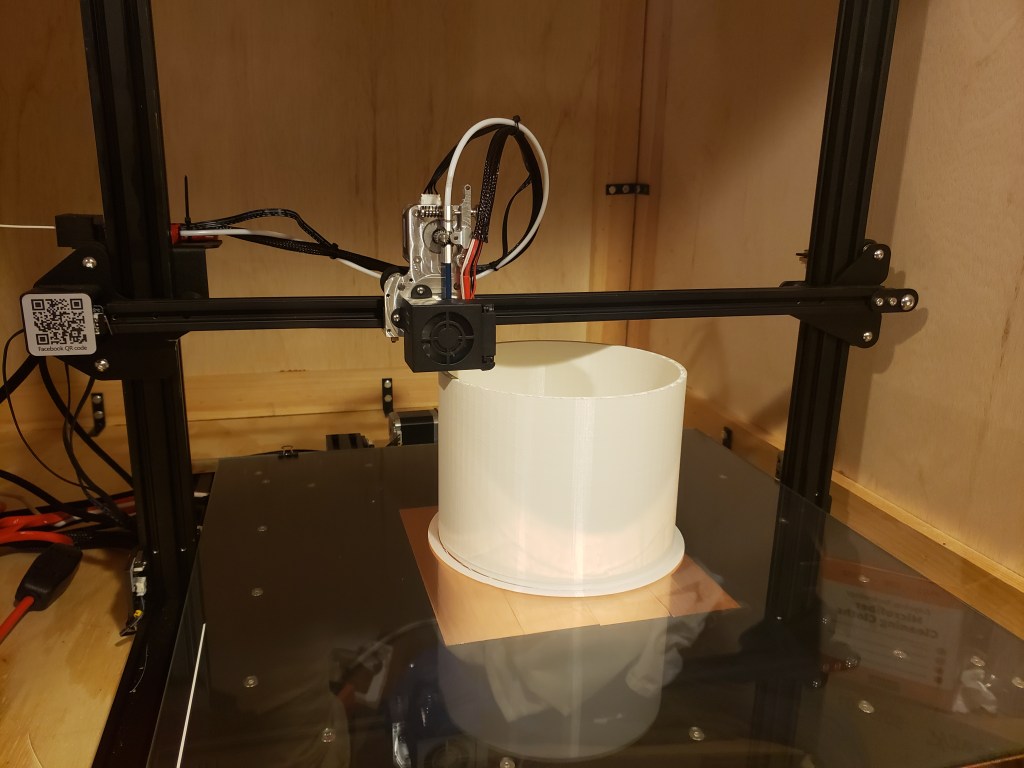
The current print is just a PLA mock-up of a dry sump tank. It’s being printed to check for fitment. And as of a few minutes ago it looked like this:
The car currently looks like this:
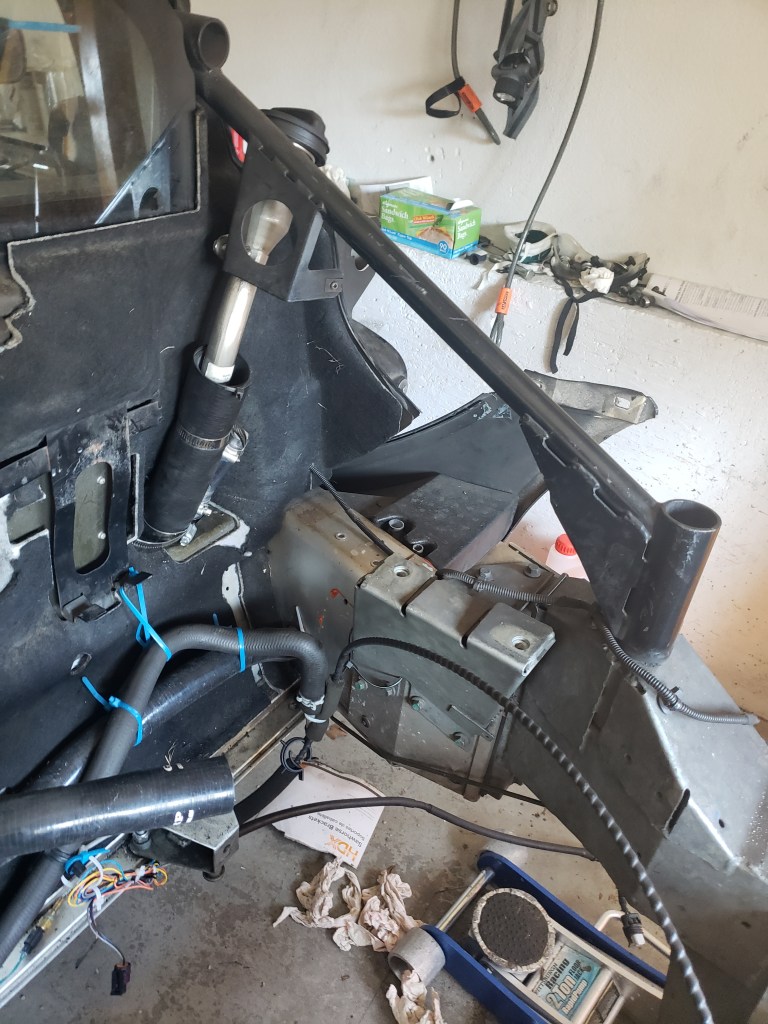
As you can see, the motor isn’t in. The motor is presently in sunny California for reasons not germane to this site (you can probably guess). The motor is due to be shipped back any day, along with a Daily Engineering Dry sump kit. The kit does not include an oil tank. It’s something of a trick fitting a tank in an engine bay that looks like this:
No it’s not always in pieces, that’s just when I seem to take pictures of it… So I’m printing a mock up of the tank to verify sizing before attempting to purchase one, possibly custom made. The issue thus far is that nobody who makes custom tanks uses the right diameter, and for the near future, the major vendors of dry sump tanks seem to be short staffed and unable to take orders due to COVID-19.
It might be, that I’ll have to fabricate my own tank. Long ago I did learn to weld aluminum, but that skill is 25 years unused and I lack both a welder and a suitable space for welding. We just got a foot and a half of snow last week, so the back yard is not an option.
3d Printing a Dry Sump tank on the other hand is a daunting challenge because the tank:
- Needs to hold motor oil, which can degrade some plastics
- The oil can have contaminants like gasoline and degradation by-products which are even more harsh on plastics
- HEAT!! Motor oil is hot. Normally oil returning to the top of the tank will be 200-250 F
- Cooling failure scenarios might produce even hotter oil, so I feel I must design for at least 350 F continuous for 5 minutes.
- Tank failure leads to oil leakage, motor destruction and severe fire danger.
- Aluminum AN fittings need to be attached to the tank
- Thermal expansion of plastic and aluminum will not match, but the difference must be minimized and the remainder accounted for.
- Fitting an immersion style oil pre-heater would be desirable but it needs to not melt the tank when I turn it on.
PLA melts at 70 C so that’s clearly right out. ABS at 200 C which sounds great except melting isn’t the issue. Heat deformation is the key issue. There will be aluminum fittings with threads, and an o-ring seal between top and bottom halves 2 parts to enable cleaning and facilitate assembly in the vehicle. Here’s an article about heat deformation of 3d plastics:
As you can see even Ultem 9085 deforms at 153c is only just barely thinkable and not really up to the 350 F (175 C) task I have in mind. This then leads me into some of the worst most complicated areas of 3d printing, high temp printing.
But wait you say? You saw this page on MatterHackers?
So did I, and for a while I believed it, but then I realized there were 2 grades of Ultem to consider 9085 and 1010. Having spent all day googling around I now recognize the Ultem numbers on that page as corresponding to Ultem 1010 not 9085. To appreciate the difference, see this page:
Nearly the only plastic that seems to be suitable is Ultem 1010. For a while PEEK sounded possible until I got lucky and found this page:
https://www.curbellplastics.com/Research-Solutions/Resources/Articles/PEEK-vs-Ultem-PEI
I had already been prowling the net for hours before I found that critical graph that shows that while PEEK doesn’t melt and may not deform under light stress until much hotter than Ultem 1010 it does loose significant strength much sooner. Without knowing that I could have built a tank, affixed fasteners, verified that they would hold and then had the threads give out when heated.
And that’s just the material choice side of things. To print such materials you either need VERY expensive printers such as those found at VisionMiner:
https://visionminer.com/collections/3d-printers
Or you need to build your own high temp printing system. The best resource so far detailing what’s required seems to be an article published in the Journal HardwareX that conveniently uses my exact printer as an example:
https://www.sciencedirect.com/science/article/pii/S2468067222000104
So the goal will be to form a community to make THAT kind of critical information and experience available to people who have a practical goal of fixing or improving their race vehicles, and help them find useful 3d models without wading through a MILLION thingverse results for toy car models, engine cut away models, models of battle tanks… etc.
Eventually such information would hopefully be sorted, tagged and searchable, but for now, we start with a blog entry. One step at a time.

2 responses to “3d Printing Race Car Parts”
So how did the print turn out? Good enough for sizing purposes, but it seems the bed was not really level and this led to both lifting of the back left of the print and a lack of water tightness. So now I’m reading this: https://blog.prusaprinters.org/watertight-3d-printing-pt1-vases-cups-and-other-open-models_48949/
LikeLike
Also tonight I’m going to re-level and print this to check how well I succeeded: https://www.thingiverse.com/thing:34558
LikeLike